Wednesday, March 13, 2013

I (now) Love Paper Piecing


I joined the Lucky Stars Block of the Month group sponsored by Don't Call Me Betsy this year.   I really am enjoying the blocks!  Elizabeth, who is organizing this, does a great job explaining how to make each block.  It's $15.00 for the year and each month you receive a PDF of that month's star.  So far we have four (one was a practice).  There is a pattern for a 6 inch or 12 inch block.  I made the 12 inch.

L to R clockwise:  Practice Star, January (Funky Star), February (Exploding Star), March (Ninja Star)

String Quilt Block Pillow

My first paper piecing project was Ashley's (Film in the Fridge) string quilt block tutorial back in 2009.   I made just one full block for a pillow swap.

Then I did a paper pieced square in a the Bee-Stitched Quilting Bee and it was so difficult for me that after doing it, I made up instructions and published a tutorial on my blog!  I didn't really get the concept back then and am sorry that I didn't do a very good job but the person who received the blocks for this quilt bee made the most amazing quilt!

Then came the parade of quilt bees that were using paper piecing star patterns, love these!

Colorwheel Geese - red and aqua
Colorwheel Geese


Indian Summer Star Pattern made into a pillow.
I also made a complex star pattern and turned it into a pillow, love this one too! 

And here's a New York Beauty block, these are really fun to do.  This quilt block is now part of a quilt that was used as a backdrop at Quiltcon this year, and donated to a children's charity.

I'm so goofy that when I spotted it on a video I was watching (I didn't attend Quiltcon) I snapped a screen shot!  Once behind Amy Butler, and another time behind Jacquie Gering.  Both amazing lectures available to watch for free on Craftsy

Are you or have you considered joining the Farmer's Wife Quilt?  I started it cutting out all the tiny pieces when I discovered that there was a paper piecing option!  It makes them so much more perfect.  I know am using paper piecing exclusively.  A few of the squares.

Four Winds
Farmer's Daughter
Cut Glass Dish
Century of Progress
And just for fun, before I began paper piecing, here's an idea of how many tiny pieces you cut out for these 6.5" squares.

Country Path - Before


Country Path - Finished

Farmer's Wife Blocks
Here are a few sites that I've collected about paper piecing:

Free Paper Piece Star Patterns (my favorite)
Free New York Beauty Block templates
Free Colorwheel Geese block pattern
Practice Paper Piecing


Wednesday, March 6, 2013

BARCELONA VERMELL


Last May I took my niece to Barcelona as a gift for her high school graduation.  
I took a zillion photos.  In Barcelona, they speak Catalan.  
The word for "red" in Catalan is "vermell". 
Barcelona was a magical city.  
The food, the Mediterranean light, the architecture and the way people live their lives outdoors.  
In 8 days we barely scraped the surface of this amazing place.  
I can't wait to go back
We took a cooking class one day and made this red pepper (ñora peppers) with bacalao (dry cod, rehydrated), olive tapenade and fried cod skin.  I can almost taste it as I write that.
Iberico ham is similar to prosciutto.  It's everywhere in Barcelona, we had it on bread for breakfast.  This is a photo from the famous Boqueria market just off Las Ramblas.
Mariquitas (ladybugs) - chocolate of course.

Above the city is Parc Güell designed by the Catalan architect Antoni Gaudí in the early 1900s.  His work is characterized by mosaics, this is one on the wall near his house in  Parc Güell
La Boqueria, someone's dinner.


Rooftop view
Bougainvillea on a fence
A window on the way up to Parc Guell
My feet, sitting by the Mediterranean sea
Roy Lichtenstein sculpture near the beaches
I have this weird thing for graffiti.  I liked this one with the red on the side and black in the middle


A day on the beach - Costa Brava

Tuesday, March 5, 2013

Inspired: Part 1

L to R, Ty Pennington, Amy Butler, David Butler (photo courtesy of amybutlerdesign.com)
Thanks to Craftsy, some of the Quiltcon lectures are available to watch online for FREE, how great is that?   This weekend I watched a couple and WOW.  I'll start with David and Amy Butler.  They.are.the.cutest.couple.  You must see this video.  And this one of David Butler in his booth at quilt market 2012.  (FYI, the videos I linked to in this paragraph are so worth watching!)

Amy Butler fabrics were part of what inspired me to sew again, back around 2007-2008 when I joined Etsy.  I accumulated a LOT of Amy Butler fabric then and made a LOT of things.

I don't want to say too much more but I do want to say that what inspired me about watching the Amy Butler lecture was that she is an artist, a true creative soul.  That's what I tapped into.  She follows her creative passion and it has led her to an amazing life.  Not everyone with creative passion has an amazing life but I believe it's still important to follow it, wherever it may lead.

So please watch some of the videos.

I'm really excited that Amy is coming to Colorado next month for Makerie and she'll be making an appearance at Fancy Tiger so I hope to meet her.

Here are some of the projects I have sewn with Amy Butler fabrics and Patterns, starting with aprons, except for two, most are my design.
Fabric lines:  Lotus, Belle, Nigella, Midwest Modern and Love


Clothing from cotton fabrics, I'm really looking forward to sewing with some of the new base cloth like rayon and voile.
Fabric lines Belle, Lotus, Daisy Chain and Nigella

Here are some aprons and clothing I made using Amy Butler patterns:
L to R:  Apron pattern from "In Stitches", Barcelona Skirts Apron Overlay (side 1 and side w), A-Line skirt, Anna Tunic front and back and Mini Dress, Tunic and Tops pattern, last two.

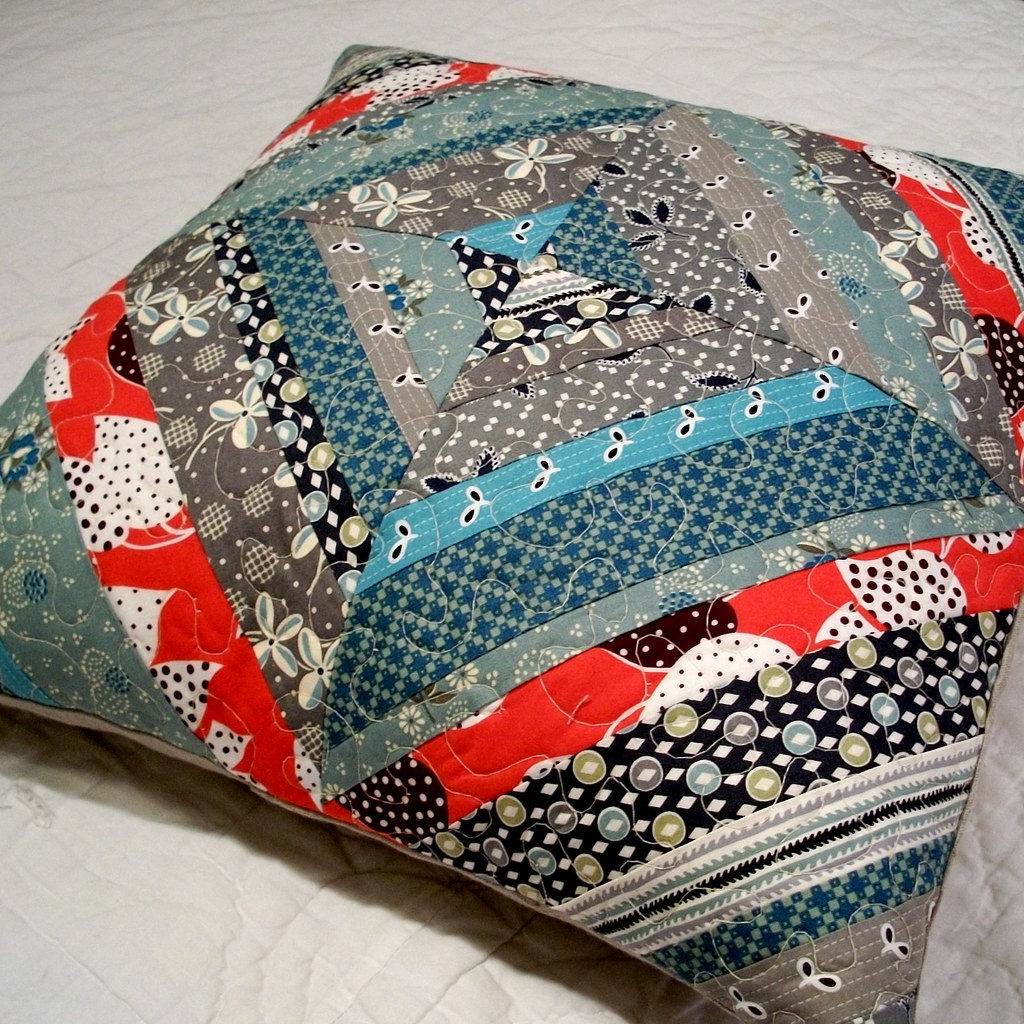
Below are some curtains and other home products I made with an enormous stash of Nigella fabric, I still love that whole line!   You can see the first pair of curtains  were in the bedroom, then moved to the living room because I made them WAY too full (photo 4), later to the kitchen (photo 5) and today they are in our new egress windows in the basement!  I kind of have decorator and home improvement ADD.
Home projects


Sunday, March 3, 2013

QUILT and SEW

Papier-mâché letters + cheater fabric = Mod Podge


Paper board letters + vintage sewing pattern paper


A corner of my sewing room
This was originally a wordless post but last night after attaching the SEW letters to the wall temporarily using that blue paint masking tape, I was in the basement and heard a loud THUD.  Sometimes the suction cup hook in the bathroom falls into the tub, I thought that was it.  About 15 mins later, another THUD.  Yikes, I was home alone so I rushed upstairs and Rosie was sleeping at the top of the stairs so I knew it wasn't her, she heard it and we both ran through the kitchen.  Just then I realized.  The letters were falling down, one by one!  I need to get some of that 3M double adhesive tape which is really bad for the wall but I can't think of any better way to stick them onto these old plaster walls!

Dr. Who Craft Day


 It started with my niece's 18th birthday last week.  She is a HUGE Dr. Who fan.

Dr. Who Fabric-covered Bulletin Board
  Or as her mother said when I asked "Does she still like Dr. Who"  reply:  "Are you kidding?  She's obsessed!"  (her mother made her a Dr. Who case for one of her birthday gifts, a new ukulele, are you kidding me?  How cute is that?) Okay then.  WAIT WAIT, she's a 'Whovian'.  I didn't know there was a name for it.
My niece "playing" Dr. Who

Fez, screwdriver

That's my niece's face on the girl, cut from the photo above (sorry I don't know the characters!)
So I went off trying to figure out what I could get her, found this adorable toile on Spoonflower and bought a yard of the cotton sateen.  Someone covered shoes with it, but I wanted more of the design to show.  Thus the bulletin board.  I bought a regular cork board without a frame (much easier to deal with, IMHO) and used Mod Podge (regular, not the fabric Mod Podge which is for adhering fabric to fabric).  One problem I had was that in a few places where the Mod Podge was kind of thick, you can see the cork board, it made the fabric transparent.  Using a thicker fabric would have been better OR painting the cork board white first. 

Close up showing the awesome print design and the glued on ribbon.
When the front was dry (I waited overnight, I think you could wait an hour or so), I folded the fabric neatly around the back and corners and stapled it down with a staple gun.  I glued the loose fabric in the back with a glue gun.  Then I drew straight lines, using a ruler, and glued on the ribbon using the glue gun, LOVE that glue gun.  It's magical.

I also made little pushpins by attaching blue buttons on the end of a tack.  You can see them in the photo below.  I hope my niece likes it!
Finished bulletin board


Saturday, March 2, 2013

New and Improved Harlequin Apron Pattern

New Version of my Harlequin Apron and Rosie enjoying a nap on a warm March weekend, I may join her soon!
 I was recently contacted by a magazine about some of my patterns, which is exciting, but also led me to upgrade the only pattern I have produced for sale, the Harlequin Apron Pattern.  The magazine wanted a project that used pre-cuts so I had to also adjust the pattern to use pre-cuts, which was not difficult, the original pattern used 5" squares that you cut yourself.

I decided to make some new samples using Bonnie and Camille fabrics.  So far I have just made the one using a Vintage Modern charm pack and 1/2 yard of the coordinating fabric but I have Marmalade waiting in the wings.

Some history about this apron.  I love to scour thrift and antique shops for vintage aprons.  I found this one a few years ago and loved the way it was made with patchwork.  Sadly these are the only photos I took and I no longer have the apron!

My original pattern instructs you to cut your own squares by color for each row, as show in the original vintage version.

LOVE big bows and this rick rack trim, also yummy vintage fabrics!

Look how some of the squares had to be pieced just to make a 5 inch square, 
we are so spoiled today buying oodles of fabric whenever we want.
I did a lot of searching online and couldn't find a pattern for the apron so I made one myself and wrote this pattern.  Here is the first one I made using Shari Berry holiday fabric.
I made the bow long enough to wrap around and tie in front OR

You can also tie in the back.

 This shows you what the apron looks like laid out.


The finished "Vintage Modern" charm pack version.
I line my aprons and the pattern has full instructions for lining.


The new pattern is available in my Etsy shop and on Craftsy.
The original pattern is for sale in my Etsy shop.

Next project:  I'm writing a pattern for this apron.