Sunday, March 3, 2013

Dr. Who Craft Day


 It started with my niece's 18th birthday last week.  She is a HUGE Dr. Who fan.

Dr. Who Fabric-covered Bulletin Board
  Or as her mother said when I asked "Does she still like Dr. Who"  reply:  "Are you kidding?  She's obsessed!"  (her mother made her a Dr. Who case for one of her birthday gifts, a new ukulele, are you kidding me?  How cute is that?) Okay then.  WAIT WAIT, she's a 'Whovian'.  I didn't know there was a name for it.
My niece "playing" Dr. Who

Fez, screwdriver

That's my niece's face on the girl, cut from the photo above (sorry I don't know the characters!)
So I went off trying to figure out what I could get her, found this adorable toile on Spoonflower and bought a yard of the cotton sateen.  Someone covered shoes with it, but I wanted more of the design to show.  Thus the bulletin board.  I bought a regular cork board without a frame (much easier to deal with, IMHO) and used Mod Podge (regular, not the fabric Mod Podge which is for adhering fabric to fabric).  One problem I had was that in a few places where the Mod Podge was kind of thick, you can see the cork board, it made the fabric transparent.  Using a thicker fabric would have been better OR painting the cork board white first. 

Close up showing the awesome print design and the glued on ribbon.
When the front was dry (I waited overnight, I think you could wait an hour or so), I folded the fabric neatly around the back and corners and stapled it down with a staple gun.  I glued the loose fabric in the back with a glue gun.  Then I drew straight lines, using a ruler, and glued on the ribbon using the glue gun, LOVE that glue gun.  It's magical.

I also made little pushpins by attaching blue buttons on the end of a tack.  You can see them in the photo below.  I hope my niece likes it!
Finished bulletin board


Saturday, March 2, 2013

New and Improved Harlequin Apron Pattern

New Version of my Harlequin Apron and Rosie enjoying a nap on a warm March weekend, I may join her soon!
 I was recently contacted by a magazine about some of my patterns, which is exciting, but also led me to upgrade the only pattern I have produced for sale, the Harlequin Apron Pattern.  The magazine wanted a project that used pre-cuts so I had to also adjust the pattern to use pre-cuts, which was not difficult, the original pattern used 5" squares that you cut yourself.

I decided to make some new samples using Bonnie and Camille fabrics.  So far I have just made the one using a Vintage Modern charm pack and 1/2 yard of the coordinating fabric but I have Marmalade waiting in the wings.

Some history about this apron.  I love to scour thrift and antique shops for vintage aprons.  I found this one a few years ago and loved the way it was made with patchwork.  Sadly these are the only photos I took and I no longer have the apron!

My original pattern instructs you to cut your own squares by color for each row, as show in the original vintage version.

LOVE big bows and this rick rack trim, also yummy vintage fabrics!

Look how some of the squares had to be pieced just to make a 5 inch square, 
we are so spoiled today buying oodles of fabric whenever we want.
I did a lot of searching online and couldn't find a pattern for the apron so I made one myself and wrote this pattern.  Here is the first one I made using Shari Berry holiday fabric.
I made the bow long enough to wrap around and tie in front OR

You can also tie in the back.

 This shows you what the apron looks like laid out.


The finished "Vintage Modern" charm pack version.
I line my aprons and the pattern has full instructions for lining.


The new pattern is available in my Etsy shop and on Craftsy.
The original pattern is for sale in my Etsy shop.

Next project:  I'm writing a pattern for this apron.


Monday, August 6, 2012

Anna Maria Horner in Colorado!

Multi-Tasker Tote

I guess I have to dust off my blog, whew.  I had such a great weekend meeting Anna Maria Horner that I had to share.  I've been sewing a long time so I find it hard to take classes, there aren't a lot of major skills I need to learn, it's more that I need to practice the ones I know but when I heard Ms. AMH would be in Denver, I signed up for the Multi-Tasker Tote bag class she was teaching at Fancy Tiger.

First, I attended the meet and greet Friday night which was a laid back event where Anna Maria was available to chat.  When I walked into Fancy Tiger, I saw the two owners in the back of the store and went back to say hello, kind of ignored the tall woman next them and then OMG, it was Anna Maria!  I pretty much acted like she was Brad Pitt or something, embarrassing.  Anyway, she has such a great personality I'm sure it went right over her head how silly I was.


 Anna Maria Horner!
 Fancy Tiger had her new fabric line Field Study for sale, as well as lots of cute things they had already made from it.

(I bought the pattern for the dress Jaime is wearing on the right, it's the Painted Portrait pattern and the fabric on the shirt that Amber is wearing on the left (which happens to be the Wiksten tank pattern but she added sleeves) is the one I used to line by bag.)

Field Study

The class was Sunday afternoon from 2 - 6 PM and I tried to cut out my fabric before the class so I'd have the full 4 hours to sew.  I didn't get it all cut out and I was sewing like a race horse to get it all done in 4 hours!  I stayed a little over and got it done.

I have to say, having the person who created the pattern in the room while you're sewing is awesome.  She taught me something new about turning a corner seam, not to mention I didn't have to read the pattern, I could just yell "HEY ANNA".  OK, I didn't really do that but I could have!


Anna Maria Horner teaching 
Also, the pattern itself is amazing.  She explained how she came up with different aspects of the design as well as the instructions.  I would have had to do a lot more "reverse sewing" if I hadn't had her right there in the class to explain things, sometimes seeing is easier than reading the instructions.
Listening to Anna


I had her sign the pocket before I sewed it in.
Multi-Tasker Tote
And my favorite anecdote of the day was when I gave her a little gift, I made a Denver postcard fabric picture for her and when I gave it to her, she thanked me and then immediately announced to the class "OK it's time to give me gifts, you can just pile them here on the table."  he he he

So there, now it's time to leave my little fantasy world where I live in a world surrounded by fabric and craftiness and go back to REALITY.  
 
Anna Maria Horner Class in 
Denver

Saturday, May 12, 2012

What up?

Juvenile squirrel watching me one day.  Obviously her or she is young because he/she didn't run away.
I just discovered the new Blogger look, yikers!  I thought I was web savvy but sadly, nooooooo.  Anyway, bear with my design here while I get used to it.  It looks amazing, just need to figure out how it works!

So I've decided to dust off the blog, oil the gears and try to do some more regular posting, yay me!

Here's a recap of things since my last post in 2011:

  • October - December 2012:  After three years consulting on a government contract, I left that job and took another government contract.  Um, really?  Big surprise that it didn't work out but lucky me, I had an offer come up in December that was amazing so off I went.  
  • January 2012:  New job, yay!  I'm working for a utility supplier on a new energy trading market which is SO cool.  Yes I am a geek.  All jobs have their ups and downs but compared to the government job, I LOVE LOVE LOVE this one.
  • February through today 2012:  Acclimating to the new job, preparing for a trip to Barcelona, Spain, working on my quilt bee (Mod Mosaic Bee), doing the Spring garden thing, and house remodeling.
 
Here are Mod Mosaic squares I've made for other bee members


Stamps and Money Quilt
This is my WIP quilt from the Bee-Stitched Bee.  These are the blocks made for me by the bee, now I have to make another 24 blocks, woohoo.


Fish Reflections
This is a photo taken in the reflection of my fish pond.  I saw the tulips and the same color in the fish and thought it was so beautiful.

Like Father
Looking into a mirror on a hike with my father.  I am totally always taking photos of wildflowers! 
Laundry Day
I love photos of laundry drying outside.  My husband's shirts.


Saturday, November 5, 2011

Wool Patchwork Dye Project


Ah the ideas that roll around in my head. Like this idea. I love wool and have been collecting pieces here and there and have also pilfered thrift stores for their Pendleton skirts and cut them up for the wool. A few years ago I made these pillows from skirt remnants:

Winter and Harvest Moon

And I've made some patchwork scarves backed with minky:
Pendleton Plaid Scarf with Minky

Now my idea is to make patchwork blankets, no batting or anything, just a patchwork of wool squares BUT then overdyeing the finished blanket with a bright color dye. I got this brilliant idea from the new overdyed rugs that are amazing and beautiful and INCREDIBLY expensive. Someone came up with the idea of taking old oriental rugs, cut into patchwork, sew together and they dye bright pink, purple, green, red, any color really. Some are just dyed and not cut up and patched together. For a mere fraction of a second I considered trying to make one but to dye wool you have to simmer it in the dye and yeah, no way I'm figuring out how to get a rug in a pot on the stove. Here are a few pictures:

So back to my experiment. Purl Soho had a great article on piecing wool which I used as my method, a double seam. Only Purl used felted wool which won't ravel and I used woven wool which will ravel so I'll have to figure that out, later.

I cut up some scraps and sewed them together.
Wool Patchwork Dye Project BEFORE

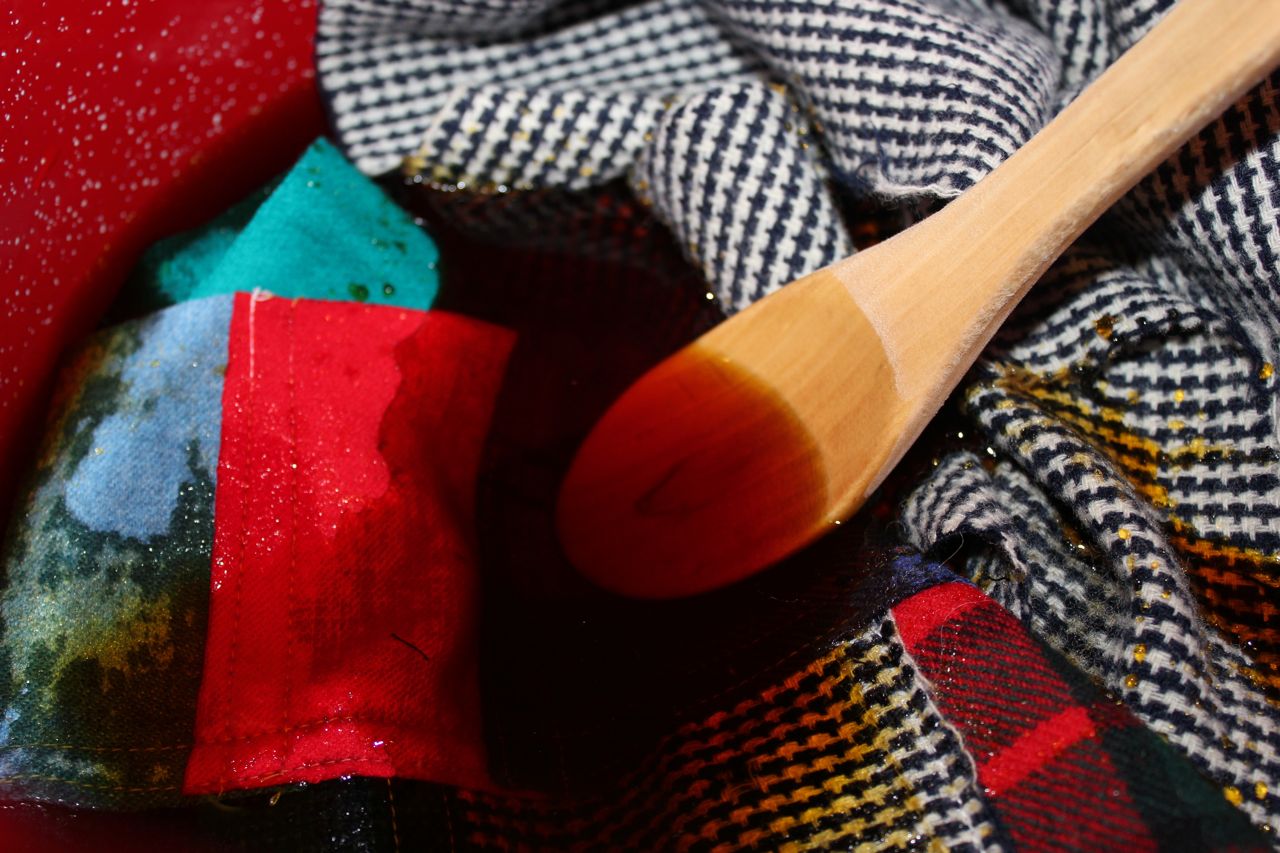
Then I got some dye that works on wool (I bought this at Hobby Lobby but Dharma Trading has awesome dyes and all the other materials which is where I will get the dye when I'm ready to do the actual blankets)

I have a LOT of experience dyeing cottons so I know the chemical process but have never dyed wool. Wow, it was SO much easier! In spite of the fact that you do have to simmer it on the stove, but the dye went right into the wool and the water was clear afterwards which surprised me. When using procion dyes on cotton, the water still have the dye color in it. Anyway, I used vinegar to set the dye, as directed on the dye packet. I also used a tiny bit of the dye, not the whole packet.

Voila, the finished product!
Wool Patchwork Dye Project AFTER

I can almost hear a collective sigh of disappointment. It's not real exciting but I love it! It gives me an idea of which colors look better after being dyed yellow. Here are some side by side comparisons.

I love this one. The white of course became yellow.

And I REALLY love this one because I'm not a big teal fan, now it's more green.

On this one the right is the before, the left is the after. Interesting, not real exciting.

You may be thinking, why not dye them before you sew them together? That is an option but I'm just loving the overdyed rugs concept which says you use one color on everything.

Saturday, October 29, 2011

The (sort of sad) Tale of a Quilt

Little Folks Voile Quilt
I've had a collection of Little Folks voile for a long time and I finally got the inspiration to make a quilt, using my own pattern, which I really like, based on the numbers 5 and 10, I made rows of blocks that were ten inches high, pretty simple but kind of fun since it was improvisational.

The voile is amazing to work with. Very smooth and soft, great feel to it, finely woven. Once the top was done (baby quilt size) I decided to use a gorgeous handmade wool batt for the inside. This came from a sheep farm, so it's like wool roving that you use to spin yarn only it had been carded into a flat sheet that was the exact size of my quilt top.

It was so fun working with the fluffy natural wool and I used a solid piece of Coloring Garden from the voile for the back. After pinning it together, I read a few articles about quilting with an unprocessed wool batt. They mentioned encasing the wool in cheesecloth first, to prevent "bearding" (I had no idea what bearding was but if you read on you too will know what it is). So I took the quilt layers apart, bought some cheesecloth by the yard, and encased the wool in cheesecloth, then put the quilt back together, pinned it and free motion quilted.

It was beautiful when I finished! But as always, I wanted to wash and dry the quilt so it would shrink to it's final size and give the quilting a little more wrinkle. Again, I had read online that you should be able to normally wash and dry a quilt with wool batting. WRONG.

I used cold water and a 4 min gentle cycle for the wash. When I took it out of the washer, EEK. It was all wonky. I stretched it out and tried to dry it as flat as possible overnight. Here is the result.

Little Folks Voile Quilt - a sort of sad tale

This is bearding. The wool fibers come up through the fabric, in spite of my cheesecloth coverage:

And the fibers aren't sitting on to of the quilt, they are still attached to the wool inside the quilt so you can't remove it all.


So, it wasn't really that sad because,

GOOD NEWS instead of listing this in my shop for sale, I get to keep it! And, it's super warm and cozy.

BAD NEWS, it's kind of wonky. It's about 34 inches wide by 40 inches long so not really great for a human throw but one can never have enough quilty things laying around the sofa for various creatures to use on chilly nights.

LESSONS LEARNED:

1. Don't believe everything you read on the internet.

2. Practice new things using small pieces of fabric first.

3. Natural, unprocessed wool batting in a quilt should be

hand washed in cold water and dried flat, like a wool sweater (duh on my part).

4. Processed wool batting, which is needlepunched and sold ready to use at Joann's or quilt stores, has already been prepared for quilters, pre-washed, super shrunk, guaranteed not to shrink. Probably a better bet to use this than what I did, unless you're like me and you love to experiment.